Saturday, July 21, 2012

The Kriyas


In the West today, we have created a nearly unthinkable number of distractions to “ease” the pain and suffering of our daily lives – overly indulgent food, drugs and alcohol, electronic distractions, media at our fingertips, instant gratification everywhere. The trouble is that using these distractions as an attempt to make ourselves feel better usually leaves us feeling much worse. Especially in America, we tend to swing between great extremes – working day and night for long periods, and then a few days of utter nothingness; our complete absorption in our workaholic lifestyle leaves us unable to cope with the periods of stillness, unable to cope with being alone and unoccupied for even a minute. We overdo the indulgences because we don’t know how to be alone with ourselves – some of us even feel guilty, as if we should always be “getting something done”.

So what are we to do? Practicing yoga asana regularly can help us feel more comfortable with stillness, and of course begin to help us quiet the mind. In my personal experience, however, I have found that it’s all about maintaining moderation and balance, so those extremes begin to have less distance between each other. One way to do this is to practice mindfulness in your everyday life, and the kriyas can help you do just that.

The Kriyas are ancient techniques developed by the yogic sages which purify and cleanse both the physical and subtle anatomy. A number of them are simple hygienic practices that you probably already do every day; what makes the practice a kriya is the element of mindfulness – taking a moment to stand back and take a breath, realize that you are doing something beneficial for your whole being, and appreciating the whole process (both the fact that you are doing the practice, and also the fact that you are fully present as you do it – be kind and thank yourself for this). I find it’s quite helpful to chant the mantra for purification (if you know it) in your head while you do most all of these exercises. Otherwise, you can concentrate on the breath, as you perform the practices with diligence and meticulousness.

There are many kriyas other than those listed below; however, these are the most universally accessible. More advanced techniques should always be practiced under the guidance of an experienced and knowledgeable teacher.

First, the simple ones that you probably already do: Danta-Mula-Dhauti (cleansing of the teeth) and Kama Dhauti (cleaning of the ears). A normal toothbrush and some ayurvedic toothpaste is just fine for the cleansing of the teeth; once again, the point is to be present as you perform the action, and to be thorough without brushing so hard as to wear away the enamel of the teeth. For Kama Dhauti, you can use a q-tip or even your index finger (as long as it is clean).

Practitioners of an Ayurvedic lifestyle recommend two more very simple practices: Jihva-Shodhana (the cleansing of the tongue with a scraper – in a pinch, water and gentle strokes with the fingers will work just fine), and Jala Dhauti (drinking a glass of warm water with lemon juice upon first waking). For Jala Dhauti, warm up the water (preferably not in a microwave), squeeze FRESH lemon juice into the cup (half a lemon for a small glass, a whole lemon for a larger glass – use your best judgment), and add a small amount of sweetener as needed (honey, maple syrup, or agave nectar). Jala Dhauti ignites the digestive fire, allowing the bowels to move more easily. Lemons are also high in several important vitamins – this website http://www.naturalnews.com/033383_lemon_juice_digestion.html has a fantastic article which covers the benefits of this kriya in greater detail.

To cleanse the frontal sinuses, try Kapal Randhra Dhauti; simply press and rub the thumb of the right hand into the indent of the forehead near the bridge of the nose. This helps to purify the psychic channels as well, and it should be practiced upon awaking, after meals, and in the evening.

Next, neti. There are two types of neti practices – the more commonly accessible one being jala neti, which is performed with warm salty water and requires a neti pot (sometimes called a neti bowl, commonly available for purchase). 


Fill the neti pot with room-temperature or slightly warmed, distilled water (never use unpurified water, as the nasal passages are an excellent gateway for bacteria to creep into all areas of the body, including the brain), and mix in a package of salt made especially for use in neti pots: 


This is just an example; many brands are available in local drugstores. Never use plain table salt – this will be extremely uncomfortable and potentially damaging. Gently blow the nose with a tissue before beginning this practice. Insert the spout of the neti pot into one nasal passage, and tilt the head ninety degrees, so that one ear is over the other. Allow the water to flow in one nostril and out the other (over a sink is best), while breathing through the mouth. You can either use the entire pot (and refill for the opposite side), or use only half. Once you have allowed the water to pass through, remove the neti pot from your nostril and gently expel air through the nose while the head and torso hang down over the thighs, as in Uttanasana (not too vigorously, or you may end up with water in your inner ear and/or sinuses). Repeat this whole process, beginning with the spout in the opposite nostril.

These are the most basic and user-friendly of the kriyas. Many advanced techniques exist, but most require the guidance of a reliable teacher. As you can see, while some of the kriyas are indeed new practices to add to one’s routine, many of them are simple actions that you already do; one needs only to shift one’s approach, in order to change a “daily grind” into an offering, performed with grace and purity of intention.

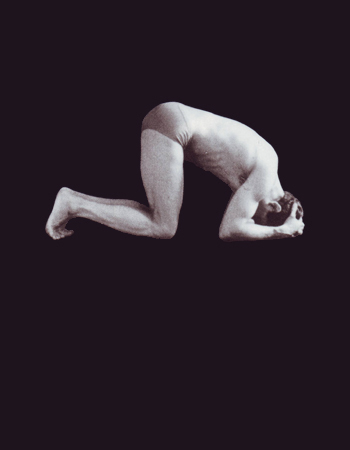
Headstand can also be considered a kriya… Check out our previous post for detailed instructions on this pose!  


Author: Danielle Gray, Online Media Manager at DYNYC

Friday, July 6, 2012

Shirshasana (AKA Sirshana)

Anyone who has attended a class with Sri Dharma Mittra will know: shirshasana, or headstand, is “the king of all the poses.” It has earned this moniker because it has numerous and tremendous benefits for all those who practice it. The best thing about this pose is that you don’t have to be flexible to do it.

And why would you WANT to stand on your head? The list of reasons is almost overwhelmingly extensive…

All inverting postures reverse the energetic flow in our bodies; they increase blood flow to the brain, as well as the glands in the head and upper torso. According to Sri Dharma Mittra’s book, Asanas: 608 Yoga Poses, “Inversions recharge the endocrine glands that regulate the immune system and hormonal production” (146). Inversions can also offer relief for people who suffer from loss of sleep and/or memory, as well as those who are chronically sluggish. In postures where your feet are above your head (headstand, shoulderstand, handstand, and all their variations), the veins of the legs are given a chance to rest, while toning the internal organs. Headstand is a much more efficient and deep-reaching “workout” for all the muscles of the torso than, say, crunches. When we are upside-down, the internal organs suddenly find themselves in a new relationship to gravity; because they have to work to hold themselves in place now, you are strengthening the deepest layer of your abdominal muscles. Without putting in any extra effort, your body is constantly readjusting itself to find balance in this new orientation, and you become stronger without having to “do” anything except settle into the pose.

Headstand specifically is said to reverse the process of aging. The “how” is a little confusing, but bear with me:

In yogic philosophy, the part of our bodies that corresponds with the sun is located in the navel (our “digestive fire”), while the moon corresponds to our third eye region. According to yogic thought, we age because the nectar of the moon naturally drips down (from the pull of gravity as we stand erect) to the sun region and is gobbled up by the sun’s fiery energy. Therefore, while in headstand, you can augment the anti-aging qualities of the pose by mentally chanting, “Surya, Surya, Surya” (sun) and simultaneously concentrating on the third-eye region; then chant, “Chandra, Chandra, Chandra” (moon) while concentrating on the navel region. This is said to reverse the flow of the moon’s nectar, by using the faculties of our imagination to “switch” the location of the sun and moon in our subtle bodies for a few minutes every day.

Yoga Asanas by Swami Sivananda also states: “This is a panacea, a cure-all, a sovereign specific for all diseases. It brightens the psychic faculties and awakens Kundalini Sakti, removes all sorts of diseases of the intestines and stomach and augments mental power. This is a powerful blood-purifier and nervine tonic. All diseases of the eye, nose, head, throat, stomach, genitor-urinary system, liver, spleen, lungs… are cured. Wrinkles and grayness will disappear. ‘He who practices this for three hours daily conquers time’ –Yoga Tattva Upanishad.”

To sum up: “Sirshasana invigorates, energises and vivifies” (Sivananda).

With all these wonderful benefits, is there anybody who should NOT practice shirshasana? People with any of the following conditions should avoid headstand: detached retina, glaucoma, high blood pressure (those with low blood pressure should move slowly and carefully in/out of the posture… then again, so should everybody else!), and/or a herniated cervical disc. People with these conditions can practice gentler inversions, such as legs-up-the-wall pose.

This asana should be practiced on an empty stomach.

Now that you know all these wonderful things about headstand, you are probably just CLAMORING to try it. So how do we start?

Swami Sivananda tells us: “Do it slowly. Do not be anxious. Be calm. Be cool. There is eternity before you.” (Yoga Asanas)

Sri Dharma would also remind us to renounce the fruits of our actions. All those benefits mentioned above? Give them away – imagine you are doing the pose for someone in need, or for the Supreme Self. It will enrich your practice in ways that you may not have even imagined.

Now we are ready to start.

It is ideal to begin at the back of your mat, so that if you roll out of the pose, you will roll onto a softer surface (beginners can also practice with a wall behind them if they are frightened of rolling out of the pose). Begin sitting on your heels. Fold your arms, placing one forearm in front of the other, to approximate the width of your shoulders, and place your elbows/forearms down on the mat. Leave your elbows where they are (although it may seem counter-intuitive, you do not want your elbows to splay out wider than your shoulders), and open up your forearms in order to clasp the hands and place the pinky-side-edge of the hands down on the mat (so that your two elbows and the interlaced fingers form three points of an equilateral triangle).

Jai Sri Dharma – thank you for the lovely demonstration!

Next, place the top of the head down on the mat, near the hands. Beginners can have a little bit more weight towards the hairline, but ideally we rest on the flat part at the very top of the head. We never want the weight on the back of the head. Your hands should cradle the crown of the head (around the place where the parietal and occipital lobes of the skull meet).


From here, stand up on your feet.


Begin to walk the feet towards the face, which will bring the pelvis over the shoulders (focus on the sacrum – the back of the pelvis – aligning over the back of the neck). If you have very flexible hamstrings, keep walking towards your face until you sort of can’t anymore – your feet will come up off the ground naturally, and the knees will move towards the chest. If you don’t have flexible hamstrings, walk until you actually can’t anymore, and then think of hugging your knees in towards your chest, bringing your feet off the ground to come up to a little egg shape. Try not to jump or push too hard to accomplish this – really use your core to get the knees close to the chest. This is the hardest part; most times in your first attempt, you will be hesitant to move the pelvis far enough over the shoulders. It almost feels like your pelvis will extend slightly past the shoulders, as pictured below. It feels further than you think will be necessary!


Next, rest here. If this is your first attempt, congratulations (and if this is your millionth attempt, congratulations)! This is a huge accomplishment, and you are well on your way to the full pose. Take a moment to feel steady and close the eyes, concentrating on the space between the eyebrows. When you can hold this position comfortably for a minute or two, you are ready to progress to the next stage. Begin to move the knees over the hips. You may feel the pelvis moving back the other way (towards the face), to compensate this shift of weight. The biggest mistake most people make is to try and kick the feet “up”; but when you are upside-down your perception of “up” is a little off, so most people will kick the legs on a diagonal (inclining them slightly towards the front side of the body, which then throws you off balance and causes you to come down out of the pose). To avoid this, keep the knees quite bent at first, and start to move them upwards.


Eventually, stack the knees directly above the hips. As you move the knees, it may be helpful to press the forearms down slightly into the floor, remembering to keep lots of space around your ears and feeling the neck long (so that your shoulder blades stay firmly rooted down the back… which in this case is actually up to the ceiling).


The last step (and the easiest), is to straighten the knees.


Congratulations! You are now in headstand. Try to keep the breath fluid and easy, always through the nose. Close the eyes and meditate here. As Sri Dharma says, “Imagine a beautiful, red rose” in that space behind the forehead. Try to see it in great detail. Start by holding for just a few seconds, and each day try to increase how long you stay in the pose for about 15 seconds. Eventually you will be able to stay in this pose for half an hour, especially if you have most of the weight in the head instead of on the elbows.

If you fall out of the pose, just stay relaxed and you will never hurt yourself. If you feel yourself falling, unclasp the hands and allow the body to roll down.

To come out of the pose, try to reverse the actions exactly, so as to build strength (bend the knees, slowly bring them back to the chest, gently touch the feet down to the mat).

Afterwards, rest in child’s pose and don’t come up too fast. Swami Sivananda says that this is an excellent time for meditation: “You can hear Anahata [heart chakra] sounds quite distinctly.”


For even more impressive variations to play around with, check out the pictures on this page: http://www.dharmayogacenter.com/library/asanas.php?pasanas=119&pcat=3 (scroll down for thumbnails and pick your posture).

FYI, shirshasana is also a kriya, or purification method (stay tuned for next week’s article, which will cover the kriyas in-depth). 


Author: Danielle Gray, Online Media Manager at DYNYC